Discover ‘Cotchi’s Handicrafts’: A Tribute to Lost Pets

Anyone who’s ever been a fur parent knows the immense pain that comes from losing a pet. It’s a kind of grief that lingers every time you see their beloved toys, their collars and leashes, and even the areas they used to sleep at. It’s moments like these that you want something to commemorate their life — something special that you can wear or display at in your home.

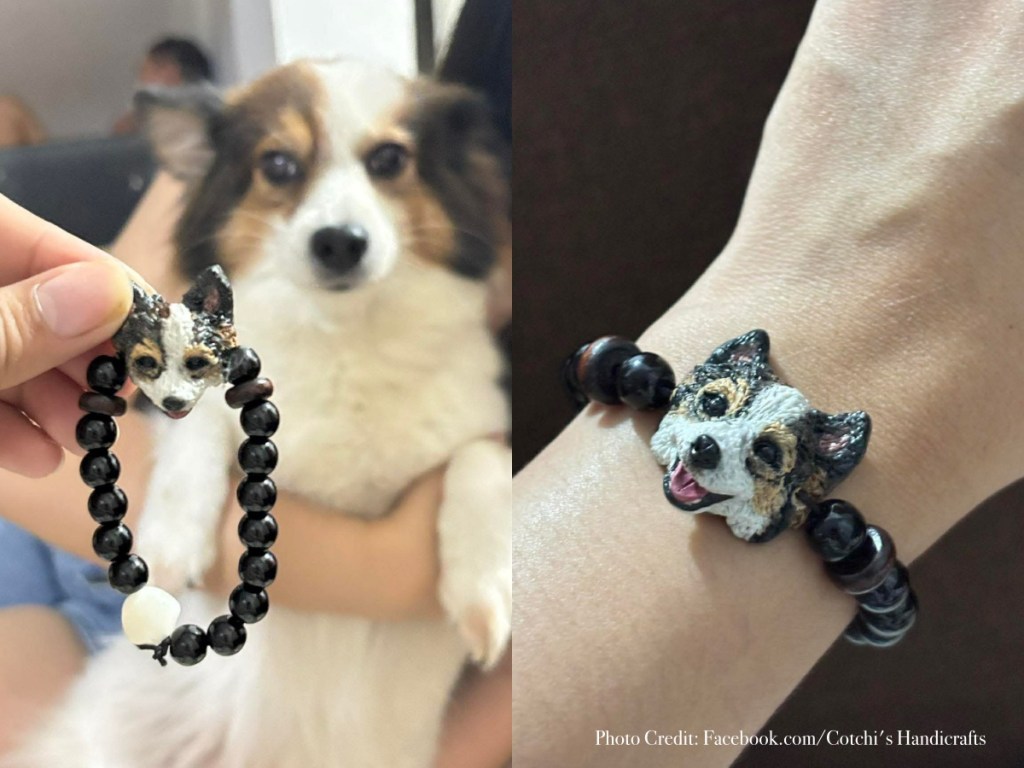
Well, there’s a local shop that does just that. Cotchi’s Handicrafts turns your beloved pet’s portraits into clay sculptures to be used as home decor, bracelets, and phone charms.

In this blog, I share with you my interview with the shop’s creator John Wendell Rivera as he explains the inspiration behind his store, his creative process, and where people can order his products in.

Here’s what he had to share with me:

Cotchi’s Handicrafts was born out of love for his pets

25-year-old John Wendell Rivera started his shop back in 2023. Named after his pets Cotton and Sachi, Cotchi’s Handicrafts was born out of the immense love for his fur babies. He was particularly inspired after the passing of Cotton.

“I started sculpting because my pet passed away. My brave boy Cotton fought until his last breath. He died in 2023 from distemper,” Rivera explained. “Even with simple clay, I wanted to bring him back to life in my own way.”

Since creating that first sculpture, Rivera has been honing his craft and creating works of art for people who have also lost a beloved pet.

“My work is perfect as a gift, especially for people who have lost a fur baby. It serves as a memory of their pet. With clay, I try to bring them back and ease a little [bit] of their sadness,” he adds.

Indeed, Rivera’s creations have been making pet owners sentimental. In fact, in one of his page reviews, a customer wrote:

“Sobrang impressed and satisfied po. Since we just lost one of our fur babies, I decided to buy two bracelets po; and aside sa napakinggan po lahat ng requests ko about details, napakabilis pa po ng process ng pag gawa. Will recommend this shop BIG TIME.”

(We are so impressed and satisfied [with the products]. Since we just lost one of our fur babies, I decided to buy two bracelets; and aside from the owner just listening to all of our requests on [our pet’s] details, he also processed our orders in a speedy manner. [We] will recommend this shop big time.)

Here’s a sample of the sculpted clay bead bracelet made by Rivera for his shop. Photo Credit: Facebook.com/Cotchi’s Handicrafts

You can see all of Rivera’s works of art through his Facebook page: Cotchi’s Handicrafts.

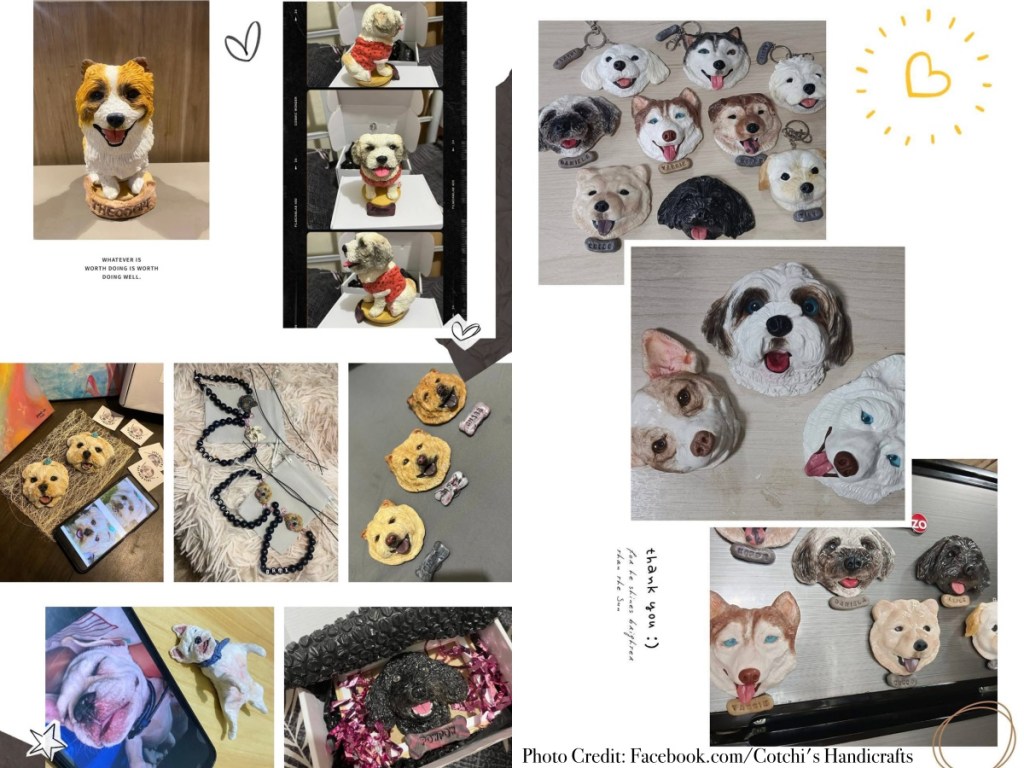
His creations take time to prepare but they’re worth it

Through many of his online videos and reels, Rivera demonstrates how he uses his customers’ pet photos to begin his creation process. He starts by making a base for his sculptures and then, slowly adds color and details.

Whether the request is for something as complex as a standee or as simple as a bracelet, Rivera makes sure to capture every little detail of your pet to ensure its likeness.

Rivera admits that custom orders often take time to make — 2 to 3 weeks to be exact — but it is definitely worth the wait as the results will blow you away.

Photo Credit: Facebook.com/Cotchi’s Handicrafts

However, pet owners can choose from his ready-made clay creations if they want to have the item immediately. It’s also good to note that these ready-made items are cheaper than custom-made orders.

To know the prices of his items, Rivera recommends messaging his page so he can share the exact price quotations.

Cotchi’s Handicrafts is available online and in local events

Interested pet owners can send their orders directly on the Facebook, Instagram, and TikTok pages of Cotchi’s Handicrafts. Rivera ships nationwide, so anyone across the country can order his clay creations.

In addition to the shop’s online presence, Rivera also attends local fairs and bazaars to sell his products.

Photo Credit: Facebook.com/Cotchi’s Handicrafts

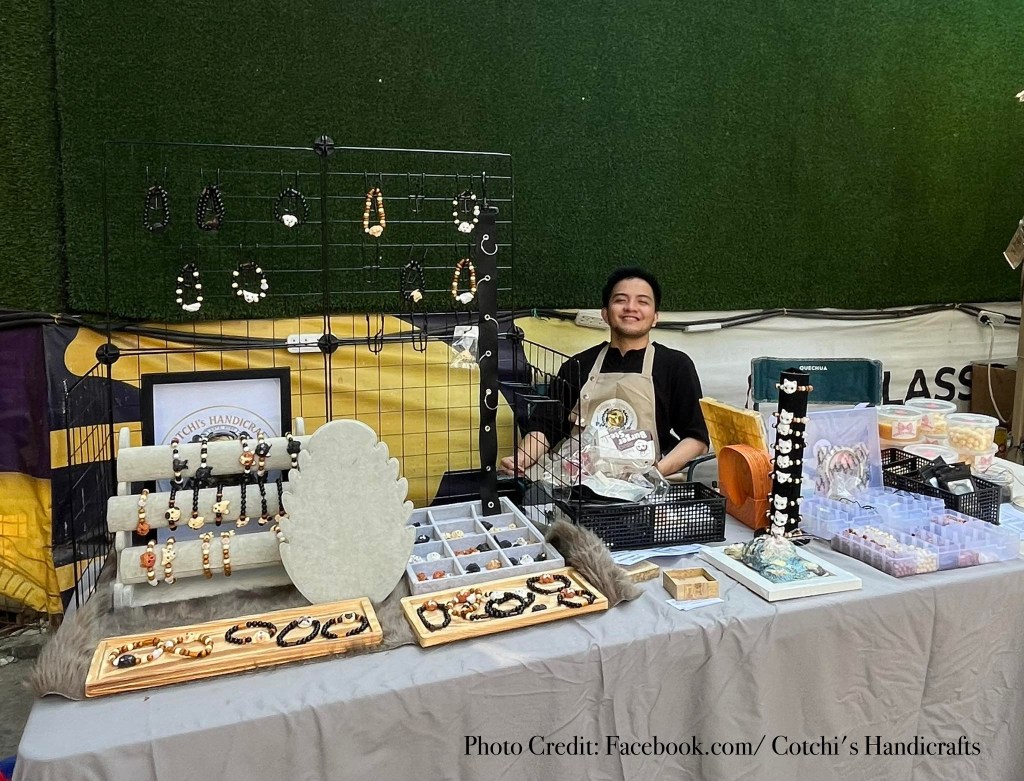
On April 29, 2026, he’ll be at Accenture for a pet expo. You can stay up-to-date on the shop’s next event through their announcements on social media.

Until then, I highly recommend that you check out this shop. You will surely not regret buying any of Rivera’s handmade creations!

***

If you want to stay updated on my latest articles and stories, you can follow me on Facebook.

I painted a stylized portrait of Merlin–and here’s how it went down

The months following May 2020 was a difficult time for me. Because not only was the country under community quarantine, but I was also unemployed and grieving the death of my beloved dog Kia. But one thing that helped me get through it all was spending time at home, binge-watching Netflix with my mom. And one of the TV shows that helped me get through this trying time was the 2008 BBC show Merlin

Thanks to the streaming platform, I was able to watch all five seasons of this awesome series.

Via Giphy

Now, there’s so much I can say to describe how obsessed I am with this fantasy show–but I’ll have to save all that for another blog post. This time around, I wanted to fangirl by creating a stylized portrait of the series’s titular character, Merlin (which was played by actor Colin Morgan). 

Here’s how I came about doing it:

On sketching 

First and foremost, I am by no means a professional artist; I just paint as a personal hobby. So given this, there are a few imperfections that I still have to improve on as a painter–many of which I hope to apply in future projects. 

Via Giphy

In this particular piece, I started off with a rough sketch of the character’s facial features on a sheet of A5 canvas paper. Then, I went on to mix different shades of acrylic paint to begin painting. 

I started with the character’s face as it would require the most attention to detail. Then, I proceeded to do the hair and apply highlights to both areas. 

The left image shows the rough sketch of my portrait, while the right photo shows my initial painting of the face.

I also decided not to follow my initial sketch and create a bigger set of eyes for a more “caricature”–like appearance. 

On mixing colors 

This was probably one of the hardest parts of painting because I had to try and get the closest possible colors to the one shown in the reference photo. 

This is a photo of the completed stylized portrait beside its reference picture. Color of the image might look different due to lighting.

I admit, this required a lot of trial and error, but I do believe that I was able to mix the right light and dark shades for the skin, hair, and the clothing. 

On shading  

Finding the right tones to use on the shadows of the character’s face was a bit difficult to do, as well. I had to experiment with varying degrees of black and gray shades to get the desired color. Then, I had to blend those in with some light dabbing strokes using my paintbrush. 

Here’s a close-up version of my stylized portrait.

The end result may not be totally perfect but I am definitely happy with the outcome of my painting. And hopefully, in the near future, I’ll get to paint other characters too like Arthur, Morgana, Guinevere, and Gaius. 

Until then, I hope you give Merlin a try–and who knows, you may even end up enjoying it as much as I did.

Via Giphy

***

If you want to stay updated on my latest articles and stories, you can follow me on social media at Facebook.com/CMilitarWrites


Inside the art of making hand-painted cookies

Back in May of this year, I got the opportunity to feature the pop culture-themed treats of Korean-American baker Judy Kim in a POP! article. Since that time, Kim has continued to hone her skill in baking, making more jaw-droppingly beautiful works of art in the form of cookies.

Just take a look at her recent baked goods featuring US President-elect Joe Biden and US Vice President-elect Kamala Harris.

She even made one in honor of the late Ruth Bader-Ginsburg.

Because of this, I caught up with Kim regarding her process for making the cookies, the inspiration behind some of her designs, and her advice for aspiring bakers worldwide. Here’s what she had to say about it. 

Making custom-designed cookies can be tedious but it’s an activity she enjoys

Just by looking at the detail put into each cookie, you would know that Kim devotes a lot of time and effort into making each one look perfect. And working full-time in the medical field, it can definitely be very time-consuming and tiring–but it’s one activity she seems to enjoy. 

“The hardest part about creating cookies is probably all the time-involved. Custom cookies are very labor-intensive! Personally, I am a full-time practicing physician, so I make cookies on the side, and I can definitely lose some sleep over them!” she explained. 

She also shared how many of her hand-painted cookies can take two or more hours to make, depending on the level of detail. And among her most tedious creations would have to be her Mandalorian-inspired cookies. 

“The Mandalorian was probably 4 hours or more in total: [this includes] baking, creating multiple layers, piping royal icing, and hand-painting.”

But through it all, she seems to find fulfillment in baking and continues to put out great designs, as evidenced by her Instagram posts. 

She was very inspired when she made her Parasite-themed cookies

Kim admits that many of her pop culture-themed cookies were made upon the requests of family members and friends. But the Parasite cookies were something special for her as it was made to celebrate the film’s momentous win in the 2020 Academy Awards (also known as The Oscars). 

Moreover, she was very happy to know that her friends also appreciated her movie-themed baked goods. 

“I definitely found the Parasite cookies really resonated with my Korean friends, and it’s great to celebrate special moments like this!” she exclaimed.

Indeed, her Parasite-inspired cookies seem to be the perfect treat to celebrate the special occasion. And I’m pretty sure even Director Bong Joon Ho would be proud of this specially-designed creation.

Her advice to aspiring bakers: “Be as creative as possible!” 

Kim surprised many of her loved ones when she started making these custom-designed cookies. 

“I think many of them were surprised because I started making cookies only about a year ago as a hobby and most of them do not [even] know that I have an artistic background,” she recalled.  

Despite their initial response to her baking, Kim continued to hone her skills and now, she has made a countless number of beautifully-designed cookies. 

Through her experience in making these hand-painted baked goods, she shares this piece of advice for aspiring bakers worldwide: 

“My advice for people who would like to make custom cookies is to start with the basics (such as finding a good sugar cookie and royal icing recipe) and feel free to be as creative as possible! The cookie-making community on social media is incredibly gracious and that is how I learned myself, by asking questions and practicing.” 


You can see Judy Kim’s full set of creations on her Instagram

Here’s what I learned about making miniatures

I first started making these miniature rooms when my friend Cath showed me the living room diorama she made as a gift to my mother. At that moment, I was so amazed by how detailed her miniature creation was–from its carefully-constructed furniture to its highly-detailed pieces. And I knew that I would like to try this project on myself. 

Fast forward to today, I have made a total of three miniature rooms and houses. 

My first project was a living room set, complete with a sofa, a cofee table, and some cupcakes.
The second one I made was a windmill house with a small shop on the side. You can watch a close-up video of this here.
My third and latest project was a pink bedroom designed with a floral dresser, a tea set, and a double deck bed. You can watch a close-up video of this here.

Now, I do admit I am still far from being a “miniature expert”. But I would like to share the things I learned from creating these projects, in case any of you would like to try this as a hobby. 

So, here are a few tips you might want to know about before working on your first DIY miniature kit:

Purchase DIY miniature kits from established online shops or websites 

This is quite possibly the most important tip I can give you and let me tell you why… So, when I decided that I wanted to make these miniature set-ups, I purchased a few kits from random sellers on Lazada and Shopee. Since it was cheaper there, I thought I was getting a good deal and saving money. But let me tell you, the kits I bought had a lot of missing parts–to the point that I had to improvise on some of the details. 

In hindsight, I realize that it might have been better to spend a little more money on DIY miniature kits that have complete materials rather than save a few bucks on kits with missing parts. 

And if I were to recommend some online sellers, I highly suggest you check out and purchase from either Lil Haven PH or Miniature MNL. They provide a complete set of materials and are even very eager to assist if you have questions about their items. 

Always have extra glue on hand 

Another experience I had from purchasing random DIY kits online was that the glue provided was dried up and not usable. Fortunately, I had extra glue on hand so that situation was easily remedied. 

However, this instance reminded me that it helps to have another tube of glue on hand, especially when the one provided to you by the seller is defective. 

Plus, the extra amount of glue may also be useful in further securing the wooden pieces of your project. 

Tweezers and electrical tape are also essential items for miniature-making

Most (if not all) of these DIY miniature kits contain electrical wires with small bulbs that you can attach to the walls and lamps of your projects. Given this, you will need some electrical tape on hand to connect the wires together and light up your room.

I created a GIF to show how the wires can light up your miniature house or room once it’s connected to the battery pack.

Another tool you may also need to have prepared is a pair of tweezers. This will allow you to easily grab those very small pieces and glue them together. And if your first DIY miniature project is as tiny and as intricate as the windmill house I made, then you are definitely going to need your tweezers beside you as you continue on crafting.

This is how small and intricate the pieces were. So, I definitely made use of tweezers to pick up, hold, and glue the items together.

Remember that it may not turn out perfect… and that’s okay 

If you were blessed by the arts and crafts gods with masterclass miniature-making abilities, then you might want to just skip this point. But if you’re like me, a regular crafter, then you might agree that there may be times when your projects don’t turn out as you expected.

Perhaps, there may be times when you still see visible remnants of glue on your diorama?  Or you may even find some pieces of fabric fraying from your furniture pieces? 

If you see these imperfections, don’t fret. Mistakes are always a part of the process. All you can do really is learn from them and adopt these lessons on your next project. Who knows, maybe with time, you will end up being an expert miniature craftsman!  

Don’t be pressured to finish it, just have fun crafting

One of my friends who also bought a DIY miniature kit shared with me that she felt a bit pressured seeing the overwhelming number of pieces she had to assemble. Understandably so, it can be a bit distressing having to think about all the things you have to cut and glue together to form the furniture. So if there’s one thing I can advise, it’s this–start with the easiest piece and work from there.   

Sure, the process can be tedious and time-consuming but that’s ultimately where the fun of crafting is! And I promise you, after finishing one of these projects, you’ll feel slightly more accomplished than you had before.

Via Giphy

Additionally, if you’re a beginner in making miniatures, I suggest trying the smaller rooms first. The first one I ever made was a 17 x 15 x 5.5cm living room that allowed me to get the feel of what it was like to make miniatures. 

This is how the 7 x 15 x 5.5cm living room looks like and it’s perfect for beginners!

Consider altering the design to fit your interests 

Now, this tip is something you might like to consider if you want it a bit more personalized. Instead of using the pictures provided in the kit, you can change it up by printing out your own and placing them in the diorama. Or maybe, you can even choose to change up the color of the walls by painting on them with acrylic paint. The possibilities you can make are endless when it comes down to it! 

Via Giphy

Hopefully these tips will help you in your next project. And remember, have fun crafting!